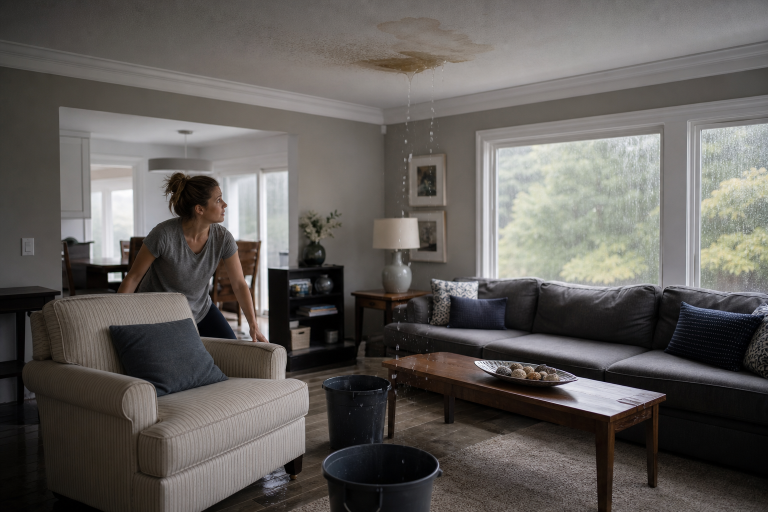
Rain Storm Leaks: Wind-Driven Rain Around Windows and Doors
Leaks become a real concern when heavy summer storms push rain sideways against your house. In July 2026, heavy rain, strong wind and severe weather events in Pennsylvania, NY and NJ caused flooding and damage to many homes. Wind-driven rain can force water past vulnerable joints, trim, flashing transitions, and door thresholds even when the window or door itself is not broken but vulnerable.

Call for a free estimate:
The key point is simple: leakage at the perimeter is often a water-management failure, not proof that the glass unit or the entire door needs replacement. In many cases, the fix is targeted repair to flashing, sealant joints, drainage paths, siding interfaces, or threshold details.
According to the National Weather Service, heavy rain can rapidly overwhelm drainage and create water intrusion risks around homes during intense storm events. The Federal Emergency Management Agency also advises that wind and wind-driven rain exploit weaknesses at openings and exterior connections, especially around windows, doors, and roof edges. Those two facts explain why a house can stay dry in ordinary rain but leak during a summer storm with sustained wind.
Why does wind-driven rain leak around windows and doors even in homes that are not damaged?
Water can get in because exterior wall systems are designed to shed and drain most rain, not to act like a submarine hull under prolonged pressure. The International Code Council requires exterior walls to provide a weather-resistant exterior wall envelope, and that envelope depends on layers working together, including flashing, water-resistive barriers, cladding, and sealed penetrations.
In plain terms, a window or door opening is one of the most interruption-heavy parts of the wall. There are corners, trim joints, fasteners, sealant lines, and transitions from siding to flashing to frame. If wind pushes enough water at those transitions for long enough, small weaknesses can let moisture pass the outer layer.
The AAMA 711 specification from the Fenestration and Glazing Industry Alliance addresses self-adhering flashing used for windows, doors, and skylights, which reflects standard practice that perimeter openings need layered water control rather than surface caulk alone. AAMA 502, also addresses field testing of newly installed fenestration products and recognizes that real-world performance depends on both the product and the installation.
What are the most common causes of Smart Window Leaks during heavy storm weather?
The most common causes are failed sealant joints, missing or poorly integrated flashing, clogged drainage paths, threshold weaknesses at doors, and water entry from a higher part of the wall that shows up at the opening.
Failed exterior sealant
Sealant ages, shrinks, cracks, or loses adhesion. When that happens at trim joints or where cladding meets the frame, wind-driven rain can move behind the visible exterior surface. ASTM C920 is the core performance specification for elastomeric joint sealants used in building joints, and it is one reason contractors should match sealant type to the joint and substrate instead of applying a generic patch.
Missing or incorrect flashing integration
Flashing works only when each piece overlaps in the correct sequence so water sheds outward. If head flashing, side flashing, housewrap laps, or sill pan details were skipped or reversed during installation, strong rain can reach the framing or sheathing around the opening.
This is one reason replacement quotes that say only “install new window” are not enough. If the scope does not explain how the opening will be flashed and integrated with the wall, the quote is incomplete. Abodence covers that vetting process in Window Installer Research Made Easy: How to Vet Door and Window Installers Before You Buy.
Blocked weep systems
Many window systems are designed to collect incidental water and drain it back out. Manufacturer installation instructions commonly warn against blocking weep holes or drainage channels. If paint, debris, sealant, or insect nests obstruct those exits, water can back up and appear at the interior.
Door threshold and sill problems
Entry doors and sliding doors face concentrated splashback and foot traffic. Water can cross a threshold if the sill slope is wrong, the weatherstrip is worn, the subsill was not flashed correctly, or the exterior landing directs runoff toward the door instead of away from it.
Water entering from somewhere else
Leaks often travel before they appear. The source may be failed siding joints, roof-wall intersections, deck attachments, or upper-story penetrations. The U.S. Environmental Protection Agency notes that moisture problems should be corrected promptly because persistent wet materials can lead to broader building damage and mold concerns. When staining appears at a window head or beside a door jamb, the opening may be the symptom rather than the source.
How can you tell whether the leak is the window or the surrounding wall?
The most reliable answer comes from controlled water testing and a careful inspection of adjacent walls or ceiling to indentify symptoms or causes, not from replacing parts at random.
Professionals often start by documenting exactly where water shows up, how long after rain starts it appears, what wind direction was present, and whether the leak happens only in extreme storms. They then inspect exterior joints, trim, cladding terminations, head flashing, and sill conditions.
That process matters because the correct fix is often much more cost effective than full replacement. If the issue is a failed head flashing detail above a window, replacing the sash will not solve it. If the issue is a worn sliding door sill or damaged frame corner, replacing nearby siding may be unnecessary.
Useful clues include these:
- Water at the top of interior trim often points to head flashing or wall-entry issues above.
- Water at lower corners can indicate drainage backup, sill problems, or threshold defects.
- Leaks that happen only with one wind direction often suggest a perimeter vulnerability rather than a plumbing or condensation issue.
- Staining beyond the opening itself can indicate water migration through sheathing or framing cavities.
What fixes usually work for wind-driven rain around windows?
The right repair usually involves restoring drainage and flashing continuity, then sealing only the joints that are supposed to be sealed.
Targeted sealant repair
Localized resealing can work when the original joint design is sound and the failure is limited to aged or separated sealant. The repair should include joint preparation, compatible materials, and correct bond-breaker or backer-rod use where needed under ASTM and manufacturer guidance. Surface smearing of new sealant over old sealant is often temporary.
Call for a free estimate:
Trim and cladding removal to repair flashing
Opening up the perimeter is often the proper fix when water is getting behind the exterior finish. That may mean removing trim, a section of siding, or both so the contractor can inspect the water-resistive barrier, install or replace flashing tape, correct lapping sequence, and add proper head flashing. This is more invasive than recaulk alone, but is probably less expensive than replacing the window because it leaked during a single storm.
Weep and drainage correction
Cleaning blocked drainage paths or correcting sealant placed over weeps can resolve some leaks without major reconstruction. This fix only applies if inspection confirms the drainage system was the issue.
Threshold and landing corrections at doors
Door leaks may require new weatherstripping, threshold adjustment, subsill flashing repair, or exterior grading changes so water runoff moves away from the opening. In some cases, the landing or stoop surface is the problem because it pitches water toward the house.
Selective product replacement
Replacement makes sense when the frame is deteriorated, the unit is structurally compromised, the sill is rotted, or the product design no longer manages water as intended. If you are weighing replacement, Abodence also has a useful comparison in Window Frame Materials Compared: The Smart Guide to Vinyl, Wood and Fiberglass.
How much do repairs for Window Leaks usually cost in 2026?
Small perimeter resealing jobs often run about $150-600, targeted flashing or trim-opening repairs commonly land around $500-2,500, and full window or door replacement can run much higher depending on size, material, and wall access. Based on 2026 market pricing published by Angi and HomeAdvisor, basic caulking and minor exterior repairs tend to stay in the low hundreds, while more invasive water-intrusion repair rises into the low thousands once cladding removal and carpentry are involved.
Those ranges are broad because access, finish materials, hidden rot, and the number of affected openings change the scope fast. A second-story leak behind fiber-cement siding is a different job from a first-floor vinyl-trim reseal.
The expensive option is not always the right one. If testing isolates the problem to one failed head flashing detail, a repair-focused scope is usually smarter than replacing multiple unaffected units.
What should a contractor’s scope include before you approve leak repairs?
A trustworthy scope should identify the suspected entry path, the materials to be opened, the water-management details to be corrected, and what interior or exterior finishes are excluded or included.
Vague proposals are a common problem with leak work because the source is sometimes assumed rather than proven. A useful written scope should cover:
- Which opening or wall area will be tested or opened
- Whether trim, siding, or interior finishes will be removed
- What flashing or water-resistive barrier repairs are planned
- Which sealant type or flashing product will be used
- Whether damaged sheathing or framing is included if discovered
- How the contractor will verify the repair before closing the wall
- What warranty applies to the repair scope itself
If permits may be triggered by replacement or structural repair, this guide can help: Window Permit Requirements: The Clear Homeowner Guide to Door and Window Rules.
When is this an urgent problem instead of a routine repair?
Prompt professional attention is warranted when water is actively entering, interior finishes are bulging, wood feels soft, electrical devices are nearby, or the leak is recurring after prior patch attempts.
Repeated wetting can damage sheathing, trim, flooring, insulation, and adjacent finishes even if the visible leak seems small. If the same wall area has leaked through multiple storms, the issue has moved beyond maintenance.
Short-term protection still matters. If a storm has already caused active interior leakage, Abodence has related guidance in Urgent Roof Leak: What to Do Right Now Before the Damage Gets Worse, and the same principle applies here: document the moisture, limit interior damage, and get the leak inspected as soon as possible.
FAQ
Can wind-driven rain leak through a good window?
Yes, water can appear around a sound unit if the surrounding flashing, trim joints, or wall interface lets rain bypass the exterior drainage path during sustained wind pressure.
Should you replace the whole window if water shows up inside?
No, full replacement is only justified when the unit or frame is failing, because many leaks come from adjacent wall details that can be repaired without replacing the product.
Is caulking enough to fix most perimeter leaks?
No, sealant helps only when the failed joint is the true entry point, and some openings need flashing or drainage correction instead of more caulk.
How do you know if hidden damage is likely?
Soft trim, recurring stains, peeling finishes, musty areas, or leaks that return after patching all suggest moisture may be reaching concealed materials.
If wind-driven rain is leaking around your windows or doors, getting a leak-specific inspection and a written repair scope is the practical next step. Please call one of the listed specialists for a free, no-obligation discussion.
Sources: FGIA AAMA 711, FGIA AAMA 502, ASTM C920, Angi 2026 pricing data, HomeAdvisor 2026 pricing data