Drafty Window Repair: 5 Clear Ways to Stop Air Leaks at Doors and Frames
Repairing a drafty window or door starts with one practical goal: stop uncontrolled air leaks without covering up a bigger installation or frame problem. If you feel moving air around an exterior door or window, the fix is often straightforward, but the right fix depends on where the leak is coming from.

Call for a free estimate:
According to the U.S. Department of Energy’s guidance on air sealing, sealing air leaks can improve comfort and reduce wasted energy. The same DOE guidance also points homeowners to common leakage areas around windows, doors, and trim, which is why a draft at the frame should be treated as a building-shell issue first, not just a hardware problem.
This article focuses on five clear ways to fix a drafty exterior door or window frame, when each one makes sense, and when a replacement or professional inspection is the smarter move.
How do you find where the draft is actually coming from?
The first step is to identify whether air is entering at the sash, the stop, the casing, the threshold, or the rough opening behind the trim. That distinction matters because weatherstripping solves a different problem than sealant or low-expansion foam.
Start with a slow hand check on a cold or windy day. Move your hand around the lock side, hinge side, top rail, bottom edge, stool, and side casing. Then look for visible clues such as cracked caulk, daylight at the edge, loose interior trim, worn door sweeps, or a sash that does not close tightly.
According to the U.S. Department of Energy, homeowners can use simple visual and touch-based checks to locate leakage points around openings. For a door, pay close attention to the threshold and sweep. For a window, focus on meeting rails, side channels, and the perimeter where the frame meets the wall. A draft that seems to come from the frame can sometimes be moving through unsealed trim joints rather than through the window or door unit itself.
What is the best fix if the draft is coming from the frame edges?
Fresh exterior-grade caulk is usually the right fix when the leak is at a stable joint between trim and siding, or between interior casing and adjacent finished surfaces. This is the most common repair when the frame itself is sound but the perimeter seal has failed.
The ENERGY STAR DIY air sealing guide recommends caulk for gaps, cracks, and openings in stationary building components. In plain terms, if the joint does not move during normal operation, caulk is generally the correct material.
Use that approach for small perimeter gaps where trim meets the wall or exterior cladding. It is also appropriate for cracked sealant joints that have pulled away over time. Remove loose or failed caulk first so the new seal can bond to a clean surface.
When caulk is enough
A simple re-caulking job is often enough when the unit opens and closes normally, the trim feels solid, and there are no signs that the frame has shifted out of square. In that case, the problem is usually a failed seal at the surface, not a deeper installation defect.
When caulk is the wrong fix
Surface sealant is the wrong choice if the gap changes width, if the trim is loose because the wall cavity behind it is open, or if the draft is coming through a larger void. The DOE and ENERGY STAR guidance separates small stationary cracks from larger openings for a reason. Bigger gaps need a different material.
When should you use weatherstripping instead of caulk?
Flexible weatherstripping is the correct fix when the leak happens at a moving part, such as the edge of a door slab or the operable sash of a window. Caulk should not be used where the unit needs to open and close.
According to the U.S. Department of Energy, weatherstripping is intended to seal movable components, while caulk is for fixed gaps. That gives you a clean dividing line when deciding which repair to make.
For exterior doors, common wear points include the latch side, the header, and the sweep at the bottom. For windows, common wear points include the meeting rail and side channels, depending on the window type. If the material is flattened, torn, brittle, or missing, replacement usually makes more sense than trying to patch it.
Door parts that commonly wear out
- Compression weatherstripping on the jamb
- The sweep attached to the bottom of the door
- The threshold cap, if it is adjustable and no longer meets the sweep properly
Window parts that commonly wear out
- Lock alignment that no longer pulls the sash tight
- Worn or missing sash weatherstripping
- Operable panels that no longer seat evenly in the frame
If the lock no longer draws the sash or slab firmly into place, replacing weatherstripping alone may not solve the problem. In that case, the unit may need adjustment or repair so the seal can compress as intended.
What if the air leak is coming from behind the trim?
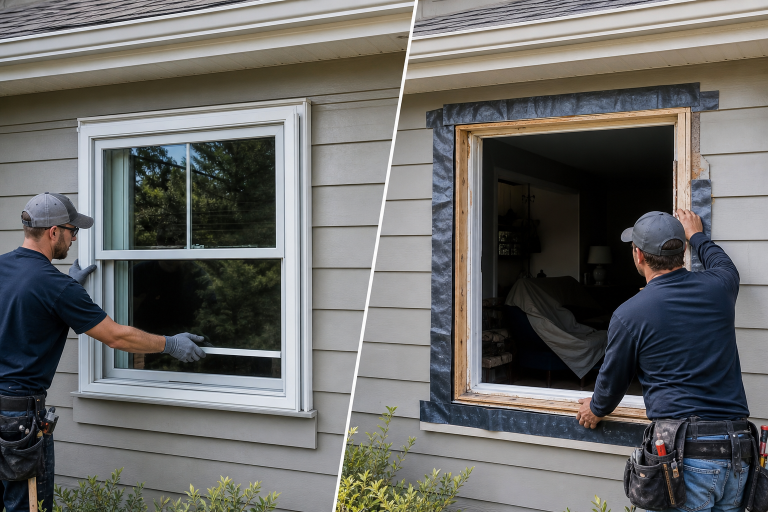
Low-expansion foam made for windows and doors is the standard repair when the rough opening around the frame was never properly sealed or the original insulation has failed. This is a hidden leak path, and it often explains drafts that remain after new caulk or weatherstripping fix.
JELD-WEN installation instructions for windows and exterior doors specify low-pressure or low-expansion insulating foam, or other approved perimeter sealing methods, because high-expansion products can bow frames and interfere with operation. This repair usually involves removing interior casing carefully, inspecting the perimeter gap between the unit and framing, and sealing that space with the correct foam or insulation method for the assembly. If the opening has large voids, water damage, or signs that the unit was shimmed poorly, the issue may go beyond air sealing.
For homeowners comparing repair paths, this is also where installation quality becomes the real question. If you are already considering new units, Abodence’s guide to insert vs full-frame window replacement is useful because a hidden perimeter leak can be a sign that an insert alone will not address the full problem.
Call for a free estimate:
One caution matters here. Foam should not be packed in aggressively or substituted with the wrong product type, because manufacturers publish installation requirements that are tied to operation and warranty coverage.
How do you know if the door or window is out of adjustment instead of just drafty?
Poor alignment is likely when the unit binds, will not latch smoothly, shows uneven reveal lines, or seals tightly on one side but not the other. In that situation, the air leak is a symptom of fit, not just a failed seal.
Andersen’s window and patio door care guidance explains that proper operation depends on hardware and sash alignment, while Masonite’s exterior door installation documents similarly tie weather performance to correct fit at the frame, threshold, and strike. A unit that is slightly out of square can leak even when the weatherstripping is still in decent condition.
Common examples include a door that has settled on its hinges, a strike plate that no longer lets the latch pull the slab fully closed, or a double-hung window whose locks no longer bring the meeting rails together tightly. Those are adjustment issues first.
If the frame itself has shifted because of structural movement, moisture damage, or a poor original installation, a simple tune-up may only help temporarily.
When is replacement or professional repair the smarter choice?
A larger repair is usually the better choice when the frame is rotted, the unit is visibly out of square, the sash or slab no longer seals after adjustment, or repeated sealing attempts have not stopped the draft. At that point, the issue is no longer just an air-leak problem.
According to the U.S. Department of Energy, windows affect both air leakage and overall energy performance, but replacement decisions should be based on the condition of the existing unit and the scope of the problem. If the draft is tied to frame damage or failed installation, repair materials alone may not restore performance.
For code and project-planning questions, especially if the work may expand beyond a simple repair, Abodence’s article on window and door permit requirements can help you sort out what may apply before work starts.
Professional evaluation also makes sense when you see staining, soft trim, recurring condensation around damaged framing, or movement that suggests the rough opening itself needs correction. Those conditions can overlap with water-management problems, and the repair scope should be defined before anyone starts sealing surfaces.
What are the five smartest ways to fix a drafty exterior door or window frame?
The best repair depends on the leak location, but most successful fixes fall into five clear categories.
- Re-caulk stable perimeter joints. Use this when trim-to-wall or trim-to-siding joints have cracked or separated.
- Replace worn weatherstripping. Use this when the leak is at a moving edge on a door or operable window.
- Replace a damaged door sweep or adjust the threshold. Use this when air enters at the bottom of an exterior door.
- Seal the rough opening behind interior trim. Use low-expansion window-and-door foam when the hidden perimeter gap is the real source.
- Correct alignment or replace the unit. Use this when hardware, frame fit, or deterioration prevents a proper seal.
FAQ
Can a drafty window usually be repaired without replacing the whole window?
In many cases, yes, because the leak may come from worn weatherstripping, failed perimeter caulk, or an unsealed rough opening rather than from a failed frame. Replacement becomes more likely when the unit is out of square, deteriorated, or improperly installed in a way that simpler repairs cannot correct.
What is the best material for sealing around a window frame?
Exterior-grade caulk is usually the right material for small, fixed perimeter joints, while low-expansion foam is used for larger hidden gaps behind trim. DOE and manufacturer installation guidance draw that line based on whether the joint is visible and stationary or part of the concealed installation gap.
Should you caulk around a door that feels drafty?
Only fixed joints should be caulked, because the moving edges of a door need weatherstripping instead. If the air is coming from the bottom edge, the fix is more likely a sweep or threshold adjustment than a bead of caulk.
How can you tell if a draft is coming from the frame or the glass?
Air movement around the perimeter usually points to frame, trim, or sash-seal issues, while discomfort near glass can also be related to the glass surface temperature itself. A careful hand check around the edges on a cold day usually helps separate a true air leak from general cold radiation near older glazing.
Is a drafty exterior door a sign of bad installation?
Sometimes it is, but wear, settlement, and failed sealing materials can produce the same symptom. A hidden gap behind trim, a frame that is out of square, or a door that never sealed evenly from the start points more strongly to an installation problem.
If you are trying to decide between a simple seal-up and a larger repair, getting a written assessment from a qualified door or window pro is the practical next step. Please call a listed specialist for a free, no-obligation discussion.
Sources: JELD-WEN installation instructions, Andersen care and adjustment guidance, Masonite installation and care documents